Most of Roms have same flashing procedure to install. So, I thought of making a post that will help you flash any custom rom on your device. Roms like Pixel Experience, Resurrection Remix, AOSP Extended or any AOSP based rom can be easily installed with this method, it is applicable for almost all the roms.

Note: This method does not work in case of sGSI rom and any Backup.Create a Back-up for you device (in case anything goes wrong).
Before we can proceed, following are the pre-requirements -
- Device must have unlocked Bootloader.
- TWRP Recovery must be installed.
- Download the Rom file and Gapps. Place it in your device internal storage.
How to any custom rom on your device -
- Boot your phone into TWRP recovery. To do so, Switch off your device, Press and hold Power button and volume up button together until the mi logo appear.
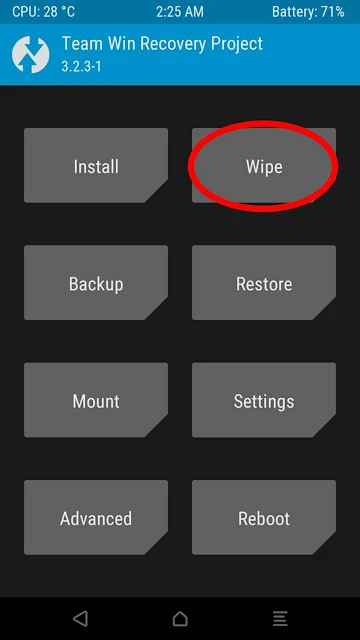
- Select Wipe -> Advanced Wipe

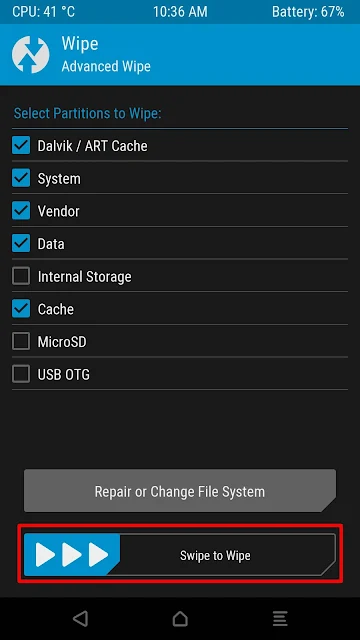
- Select System, Data, Cache and then Swipe to Wipe (Do not wipe internal storage).
- Go back and select Install

- Select the Rom file. For example - In this case, I'm going to install AOSP Extended rom but you can download any rom and select it.

- Swipe to Install the Rom

- Wait till the Rom get installed.
- If your Rom requires Gapps then follow these.
- Go back and select the Gapps zip file.

- Swipe to Install Gapps.

- Now select Reboot System.

- Select Do not install and your device will boot automatically.


All Done. You have successfully installed a Custom Rom on your Device. If face any difficulty or your device stuck in Bootloop then please mention it in comment. Thank you.
)